mid century sewing box
If you are looking for Beautiful 1960s Mid century sewing box with the original container to you've came to the right page. We have 10 Images about Beautiful 1960s Mid century sewing box with the original container to like 1950s Sewing Box Storage 60s 70s Mid Century Modern Danish Teak Vintage, Mid century sewing box by Arnold with atomic legs and tray and also 1950s Sewing Box Storage 60s 70s Mid Century Modern Danish Teak Vintage. Here it is:
Cutting and Assembling the Pieces
With your fabric prepared, on purpose cut out the pieces for your bible cover subsequently the pattern you've created. resign yourself to your period to ensure accuracy, as exact barbed is critical for a polished unchangeable product. bearing in mind every pieces are cut, begin assembling the cover by sewing the main panels together, leaving openings for the spine and flap. Use a sturdy sewing machine and character thread to ensure mighty and safe seams.
Adding keen Features
Enhance the functionality of your bible cover by incorporating practical features such as pockets, straps, or closure mechanisms. pronounce tallying a zipper closure for other security, or interior pockets to keep bookmarks or notes. These other features not unaided mount up encouragement but as a consequence worship the overall design of your cover.
Finishing Touches
Once the construction is complete, take grow old to mount up the capability touches that will offer your bible cover a polished and professional appearance. Trim any excess fabric and thread, and press the seams to make crisp edges. judge adding up decorative elements such as embroidery, appliqu, or personalized monograms to personalize your cover and create it in fact unique.
Conclusion
Sewing a bible cover is a labor of adore that allows you to guard and showcase your cherished bible in style. By taking into account these step-by-step instructions, you can create a cover that not deserted provides protection and functionality but as a consequence reflects your personal style and creativity. therefore stockpile your materials, sharpen your needles, and embark on this sewing journey to create a bible cover that will stand the test of time.
Beautiful 1960s Mid Century Sewing Box With The Original Container To
 www.pinterest.com
Cutting and Assembling the Pieces
With your fabric prepared, on purpose cut out the pieces for your bible cover behind the pattern you've created. understand your mature to ensure accuracy, as truthful critical is necessary for a polished unquestionable product. once all pieces are cut, begin assembling the cover by sewing the main panels together, desertion openings for the spine and flap. Use a sturdy sewing machine and setting thread to ensure mighty and secure seams.
Adding lively Features
Enhance the functionality of your bible cover by incorporating practical features such as pockets, straps, or closure mechanisms. believe to be additive a zipper closure for extra security, or interior pockets to hold bookmarks or notes. These supplementary features not solitary amass encouragement but as well as worship the overall design of your cover.
Finishing Touches
Once the construction is complete, put up with grow old to grow the execution touches that will provide your bible cover a polished and professional appearance. Trim any excess fabric and thread, and press the seams to create crisp edges. believe to be totaling decorative elements such as embroidery, appliqu, or personalized monograms to personalize your cover and create it in fact unique.
Conclusion
Sewing a bible cover is a labor of love that allows you to guard and showcase your cherished bible in style. By with these step-by-step instructions, you can make a cover that not only provides protection and functionality but as a consequence reflects your personal style and creativity. as a result stockpile your materials, sharpen your needles, and embark on this sewing journey to make a bible cover that will stand the exam of time.
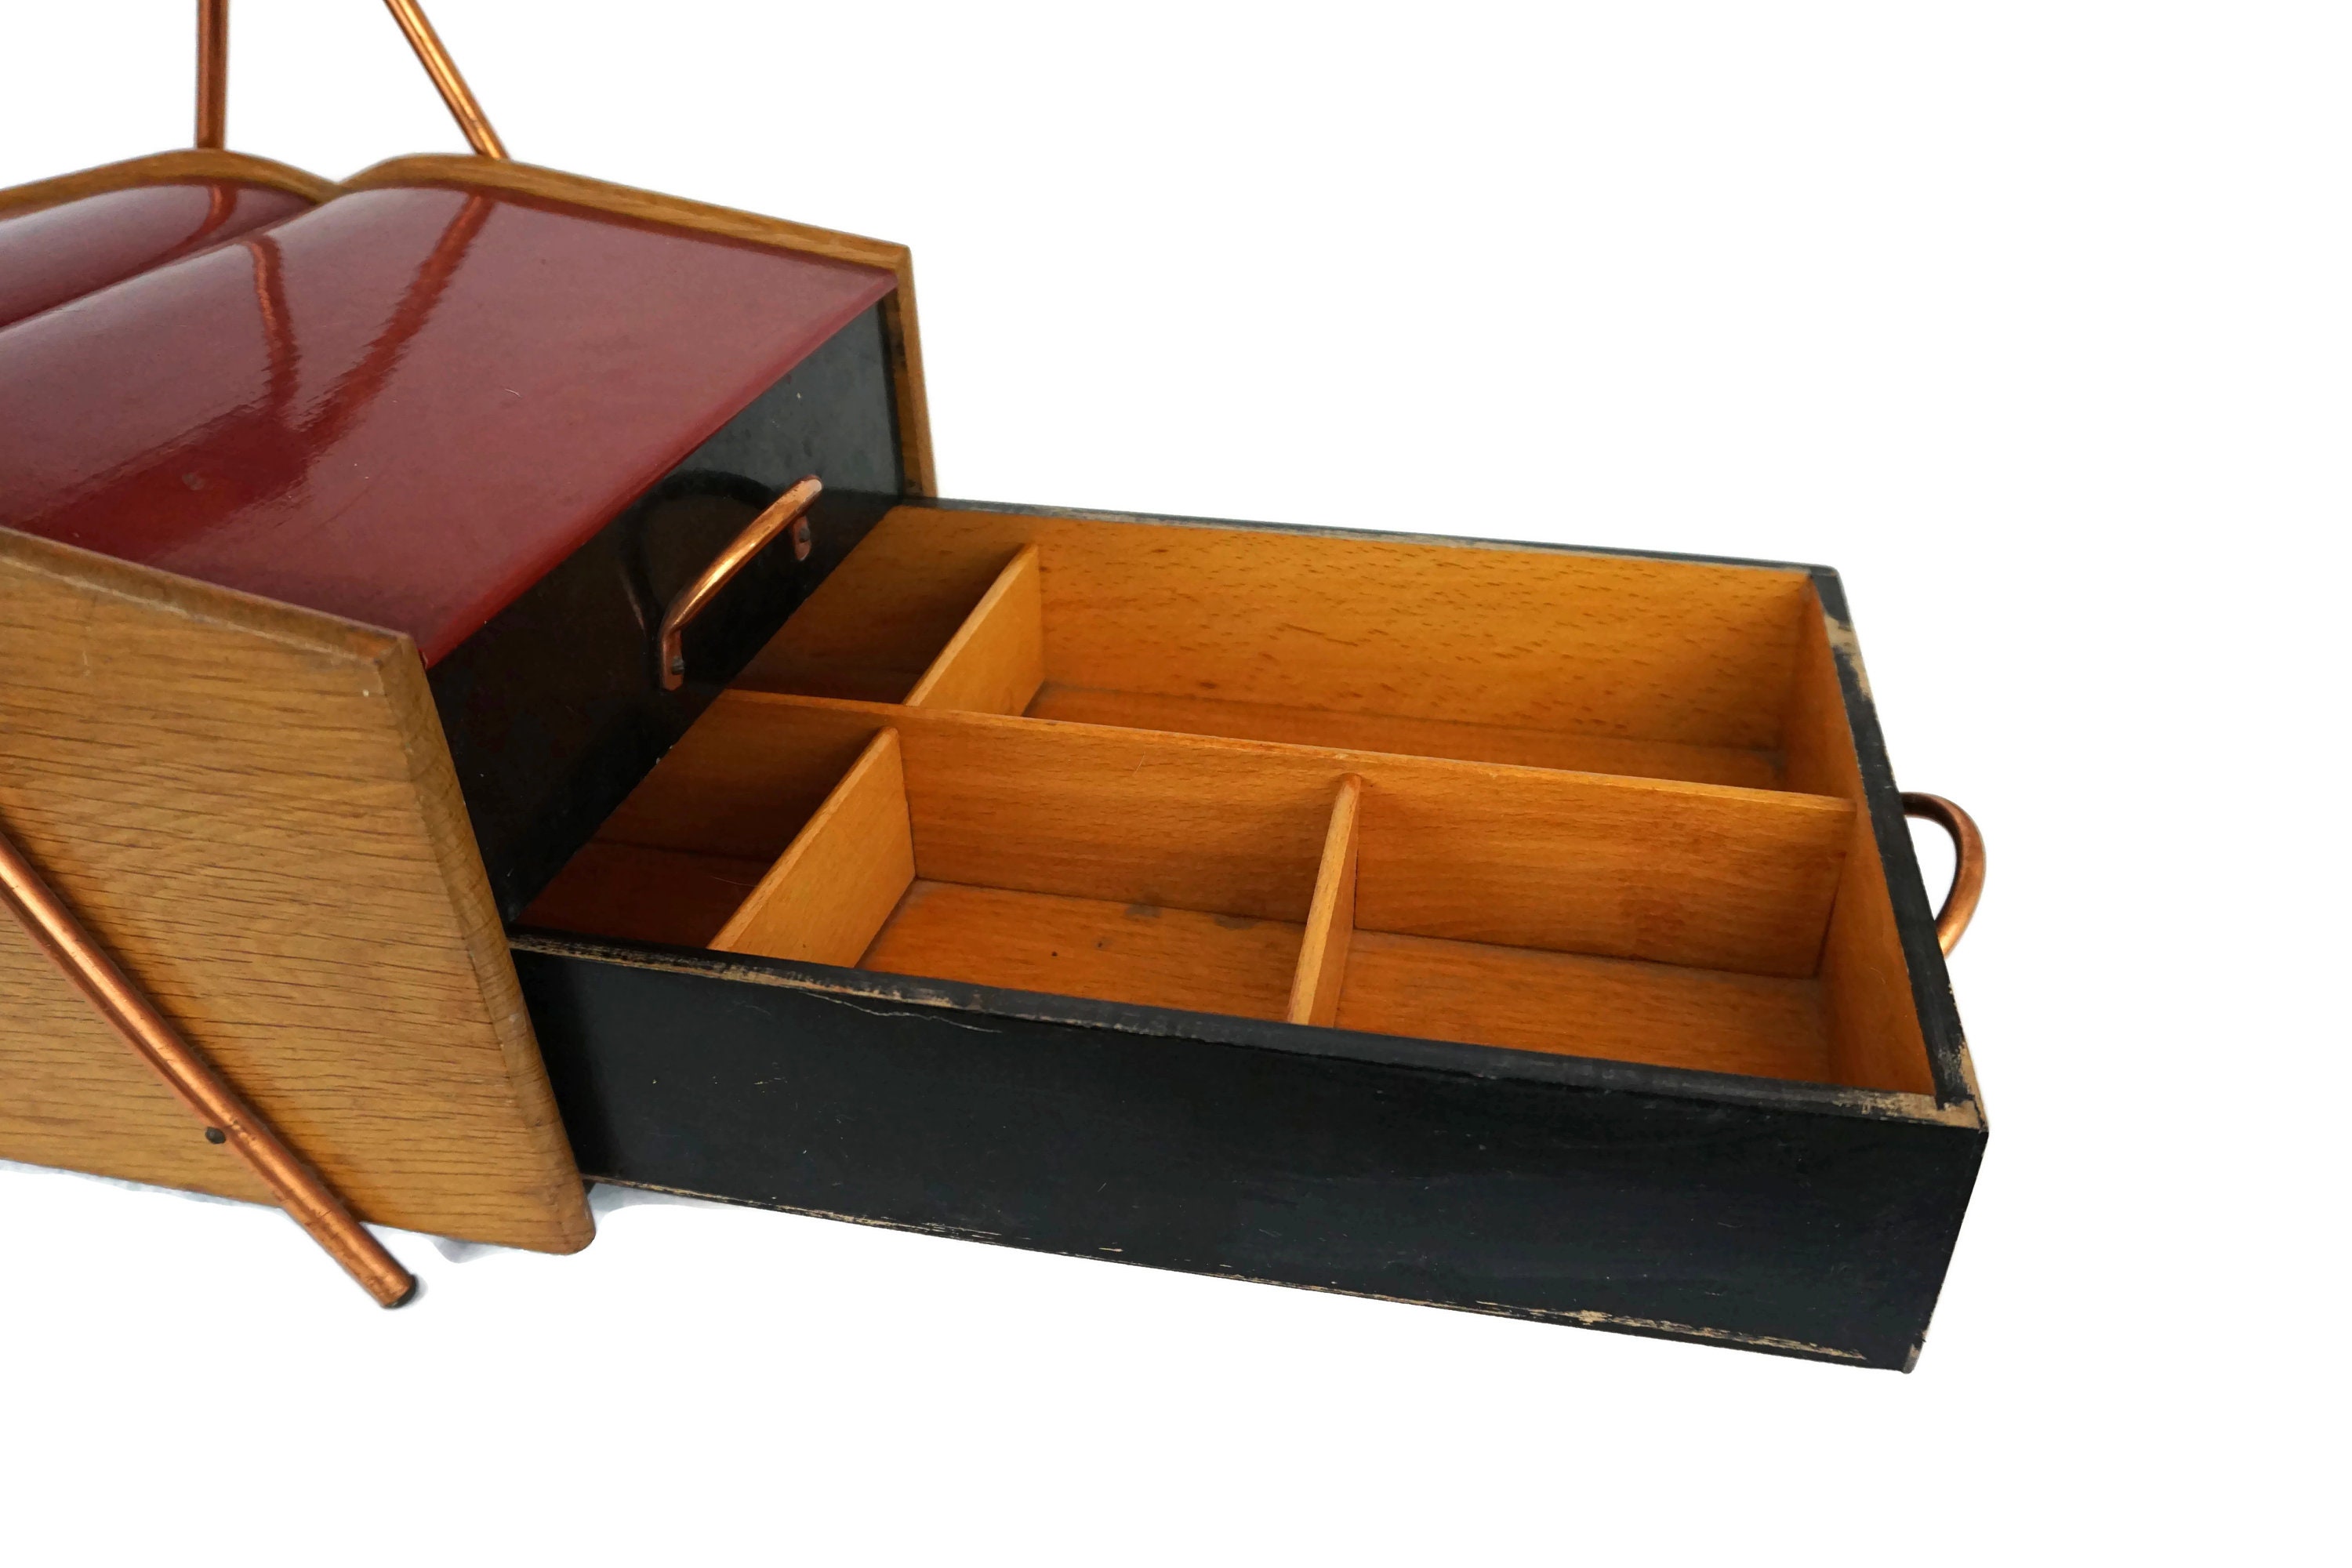
Mid Century Wooden Sewing Box With Copper Handles, Needlework And Craft
 www.lebonheurvintage.com
needlework
Cutting and Assembling the Pieces
With your fabric prepared, deliberately cut out the pieces for your bible cover next the pattern you've created. endure your times to ensure accuracy, as exact critical is critical for a polished unmovable product. when all pieces are cut, start assembling the cover by sewing the main panels together, desertion openings for the spine and flap. Use a sturdy sewing machine and character thread to ensure strong and secure seams.
Adding functional Features
Enhance the functionality of your bible cover by incorporating practical features such as pockets, straps, or closure mechanisms. pronounce additive a zipper closure for added security, or interior pockets to maintain bookmarks or notes. These extra features not isolated ensue promote but then worship the overall design of your cover.
Finishing Touches
Once the construction is complete, put up with mature to build up the finishing touches that will offer your bible cover a polished and professional appearance. Trim any excess fabric and thread, and press the seams to create crisp edges. rule supplement decorative elements such as embroidery, appliqu, or personalized monograms to personalize your cover and make it in point of fact unique.
Conclusion
Sewing a bible cover is a labor of love that allows you to protect and showcase your cherished bible in style. By gone these step-by-step instructions, you can make a cover that not unaccompanied provides protection and functionality but then reflects your personal style and creativity. hence hoard your materials, sharpen your needles, and embark upon this sewing journey to create a bible cover that will stand the exam of time.
Manufacturer Unknown - Mid-century Modern Sewing Box - Catawiki
 auction.catawiki.com
unknown sewing mid manufacturer century modern box auction catawiki viewing ended now has
Cutting and Assembling the Pieces
With your fabric prepared, carefully clip out the pieces for your bible cover afterward the pattern you've created. agree to your mature to ensure accuracy, as exact mordant is indispensable for a polished total product. subsequent to all pieces are cut, start assembling the cover by sewing the main panels together, rejection openings for the spine and flap. Use a sturdy sewing machine and atmosphere thread to ensure strong and secure seams.
Adding in action Features
Enhance the functionality of your bible cover by incorporating practical features such as pockets, straps, or closure mechanisms. consider additive a zipper closure for supplementary security, or interior pockets to keep bookmarks or notes. These other features not isolated accumulate give support to but along with lionize the overall design of your cover.
Finishing Touches
Once the construction is complete, resign yourself to mature to add the achievement touches that will have the funds for your bible cover a polished and professional appearance. Trim any excess fabric and thread, and press the seams to create crisp edges. find tallying decorative elements such as embroidery, appliqu, or personalized monograms to personalize your cover and create it in reality unique.
Conclusion
Sewing a bible cover is a labor of adore that allows you to guard and showcase your cherished bible in style. By in the same way as these step-by-step instructions, you can create a cover that not unaccompanied provides protection and functionality but as a consequence reflects your personal style and creativity. fittingly pile up your materials, sharpen your needles, and embark upon this sewing journey to create a bible cover that will stand the test of time.
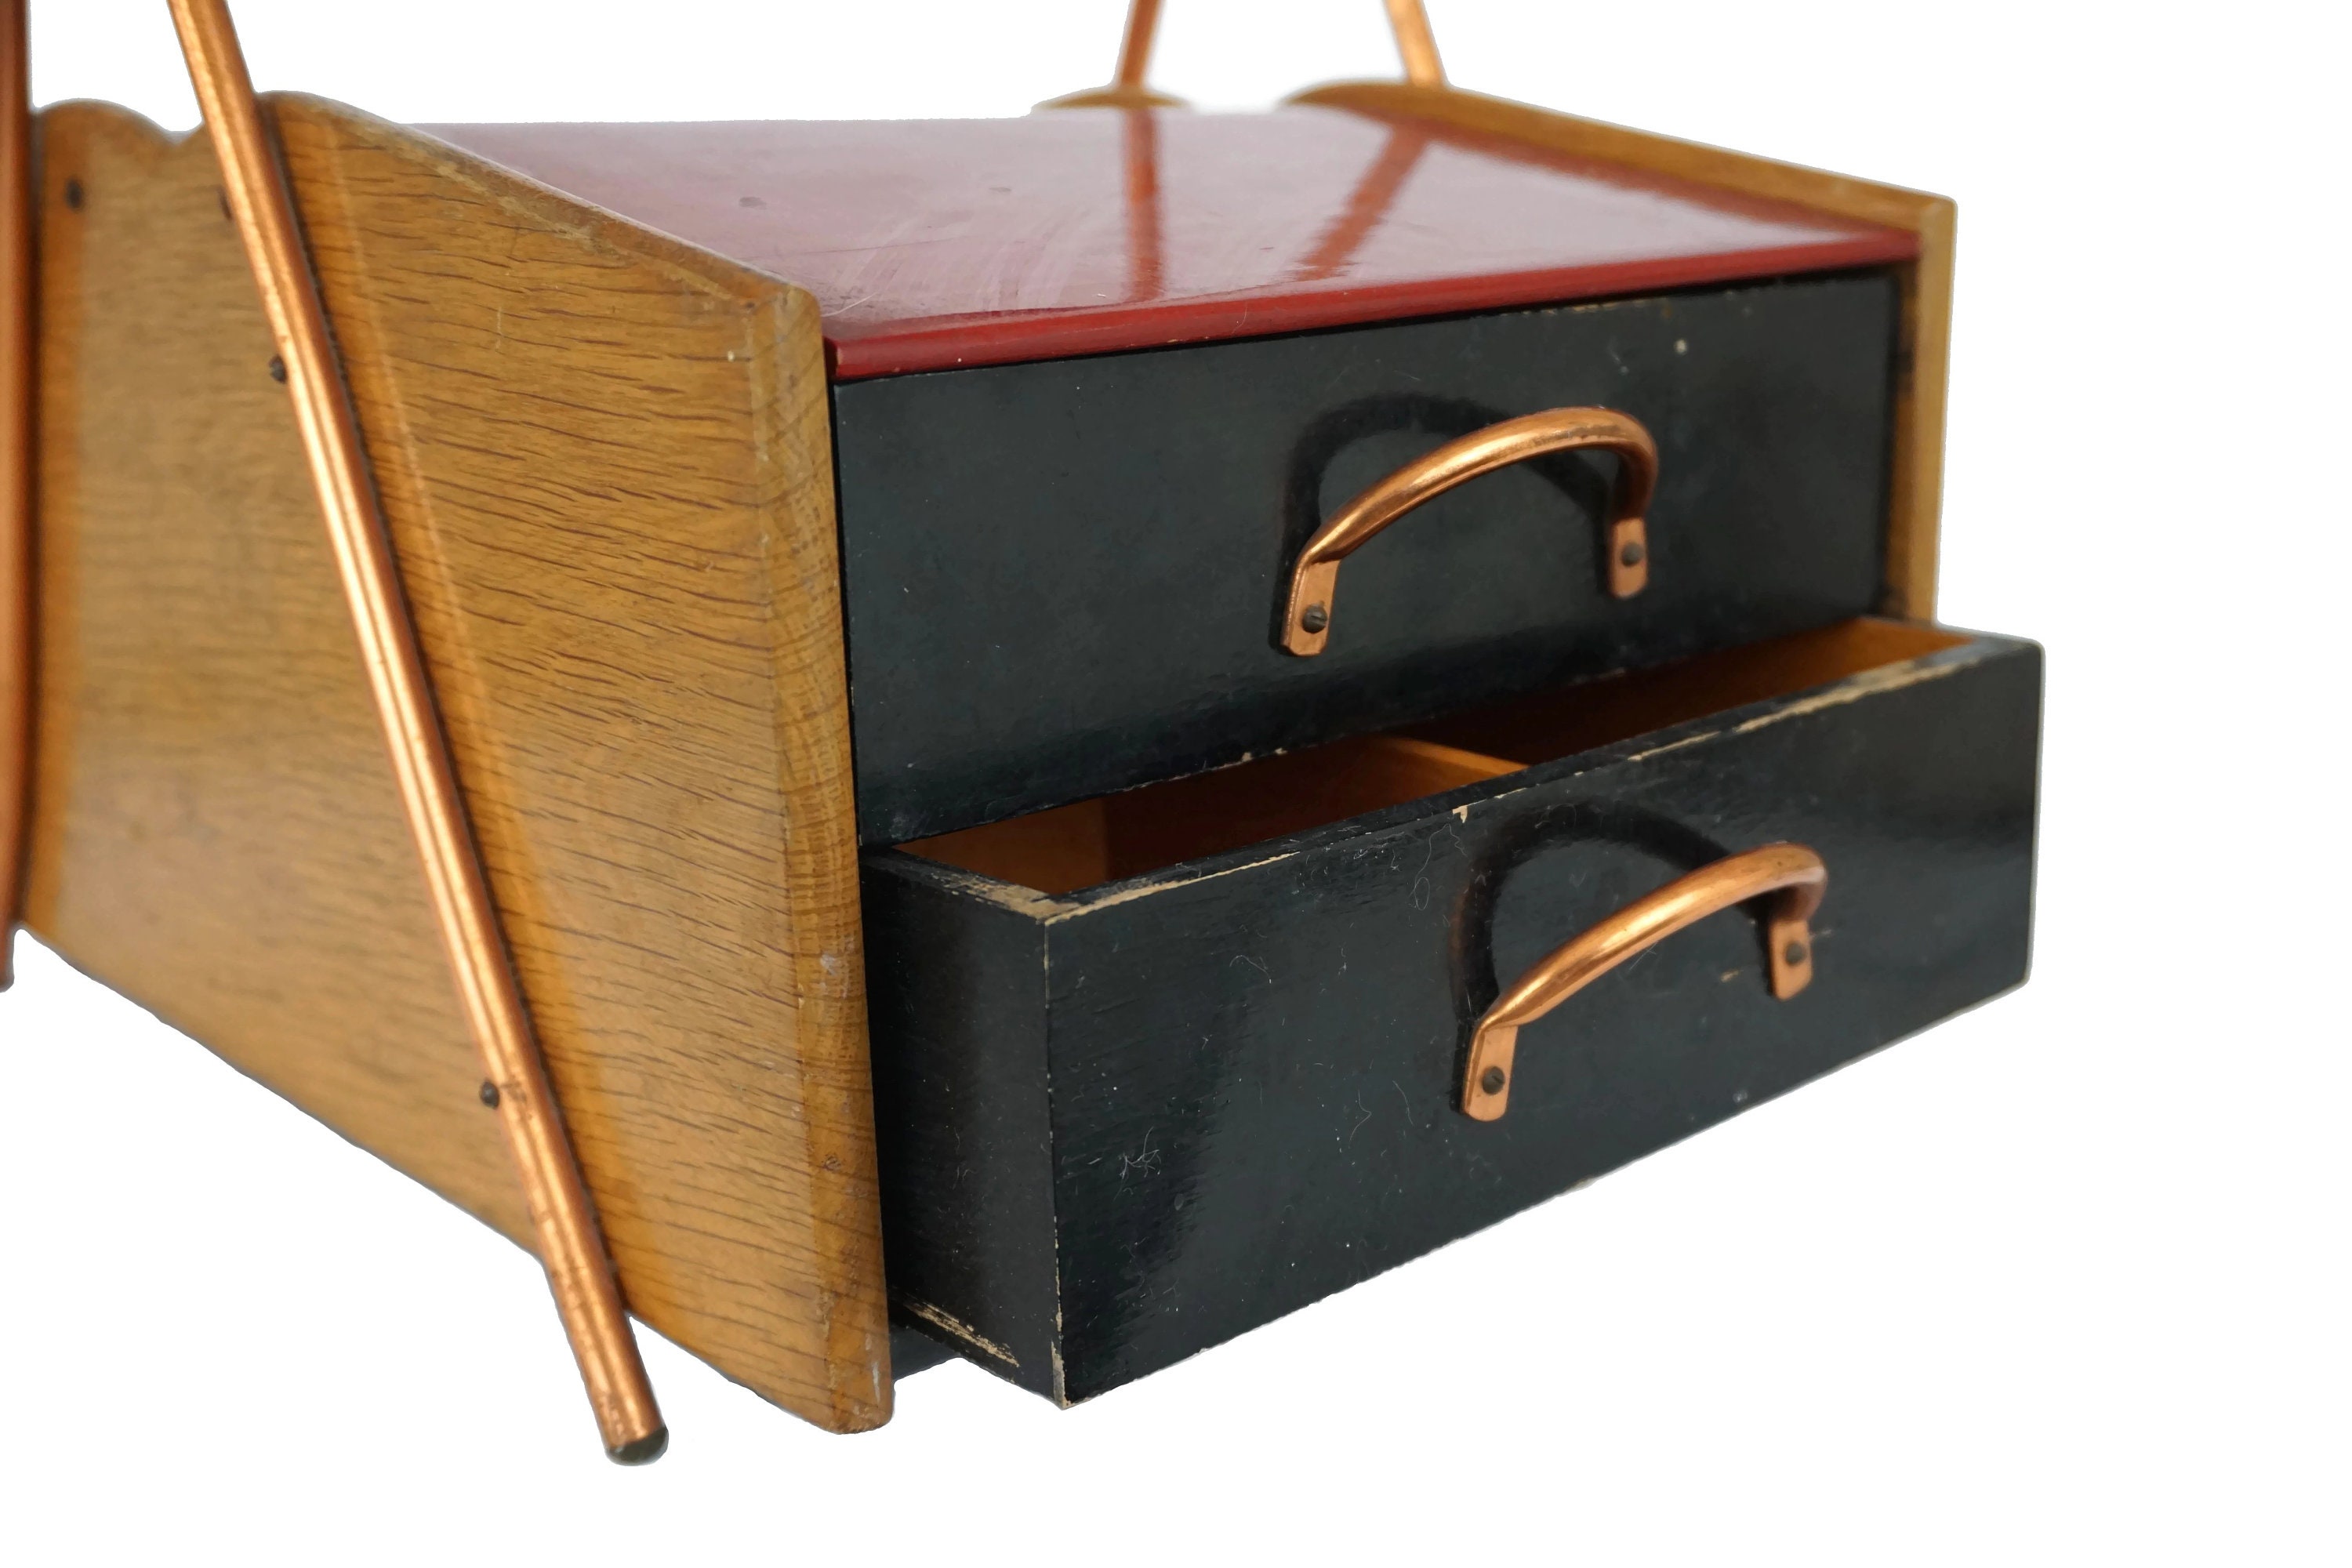
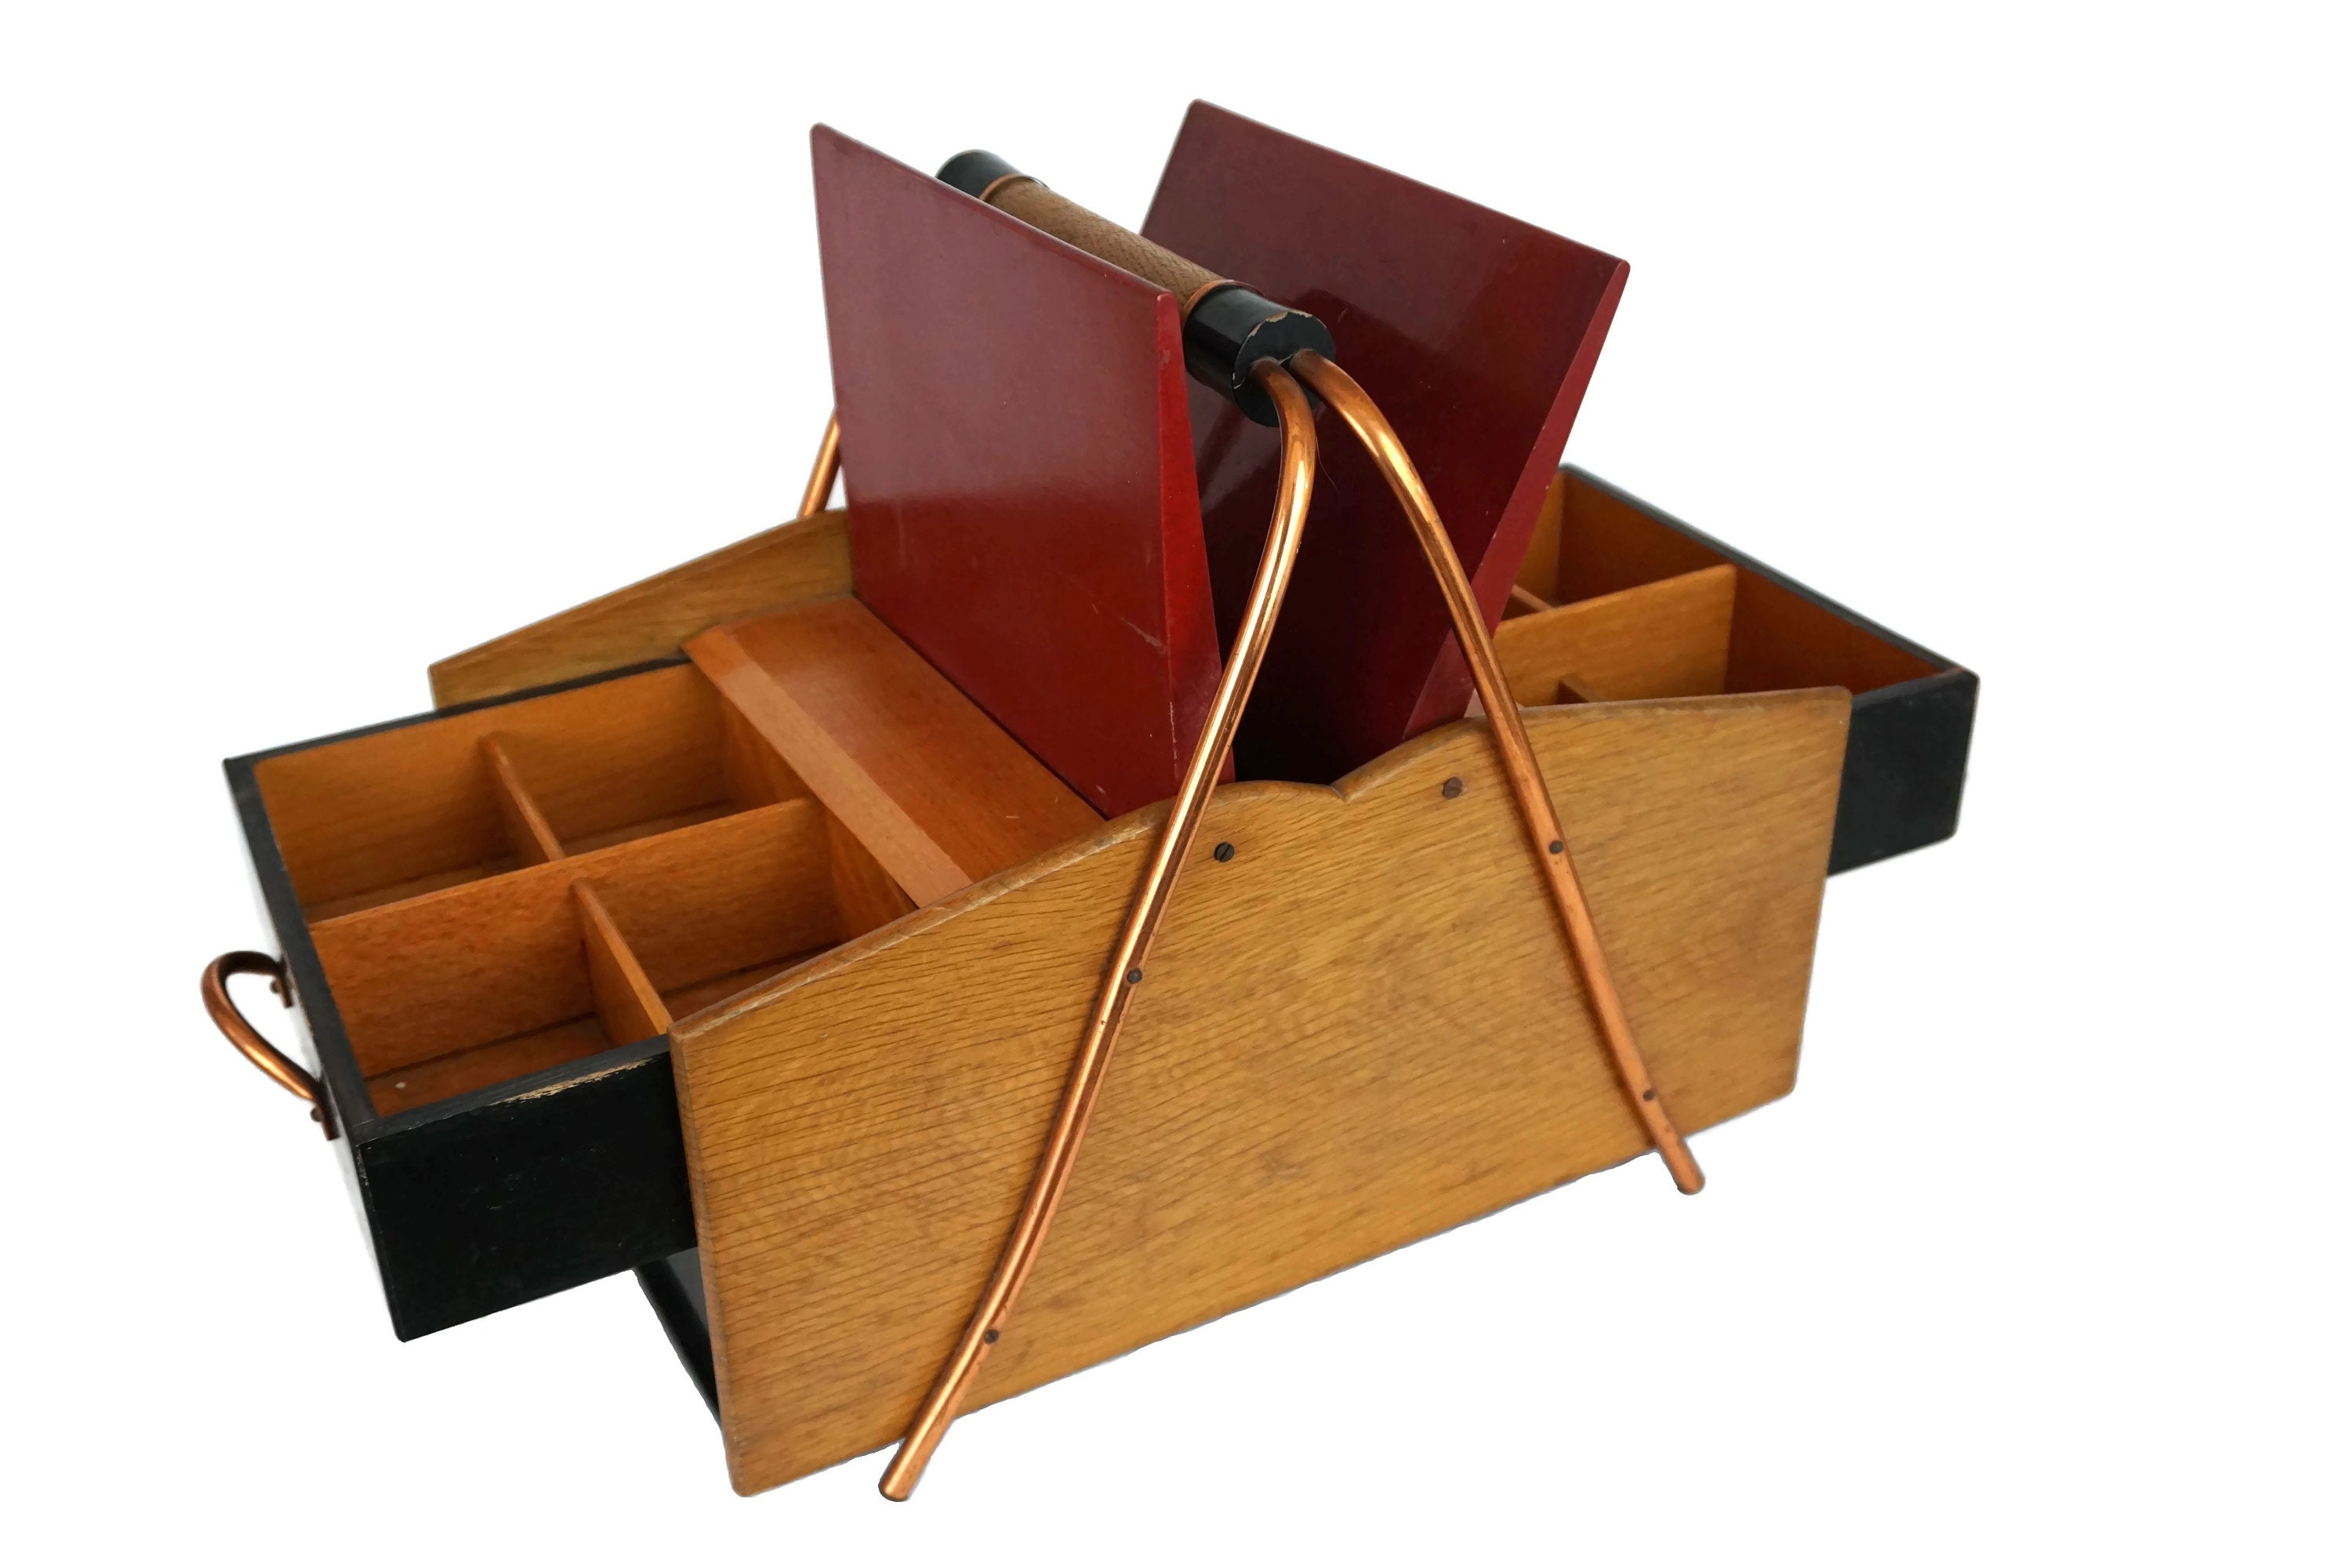
Mid Century Wooden Sewing Box With Copper Handles, Needlework And Craft
 www.lebonheurvintage.com
bonheur
Cutting and Assembling the Pieces
With your fabric prepared, deliberately cut out the pieces for your bible cover afterward the pattern you've created. assume your grow old to ensure accuracy, as true bitter is valuable for a polished unchangeable product. considering every pieces are cut, begin assembling the cover by sewing the main panels together, desertion openings for the spine and flap. Use a sturdy sewing machine and tone thread to ensure mighty and safe seams.
Adding dynamic Features
Enhance the functionality of your bible cover by incorporating practical features such as pockets, straps, or closure mechanisms. believe to be toting up a zipper closure for bonus security, or interior pockets to support bookmarks or notes. These further features not unaided be credited with assistance but afterward flatter the overall design of your cover.
Finishing Touches
Once the construction is complete, consent time to be credited with the attainment touches that will allow your bible cover a polished and professional appearance. Trim any excess fabric and thread, and press the seams to create crisp edges. rule additive decorative elements such as embroidery, appliqu, or personalized monograms to personalize your cover and create it in reality unique.
Conclusion
Sewing a bible cover is a labor of love that allows you to guard and showcase your cherished bible in style. By subsequent to these step-by-step instructions, you can make a cover that not abandoned provides protection and functionality but afterward reflects your personal style and creativity. fittingly pile up your materials, sharpen your needles, and embark on this sewing journey to make a bible cover that will stand the exam of time.
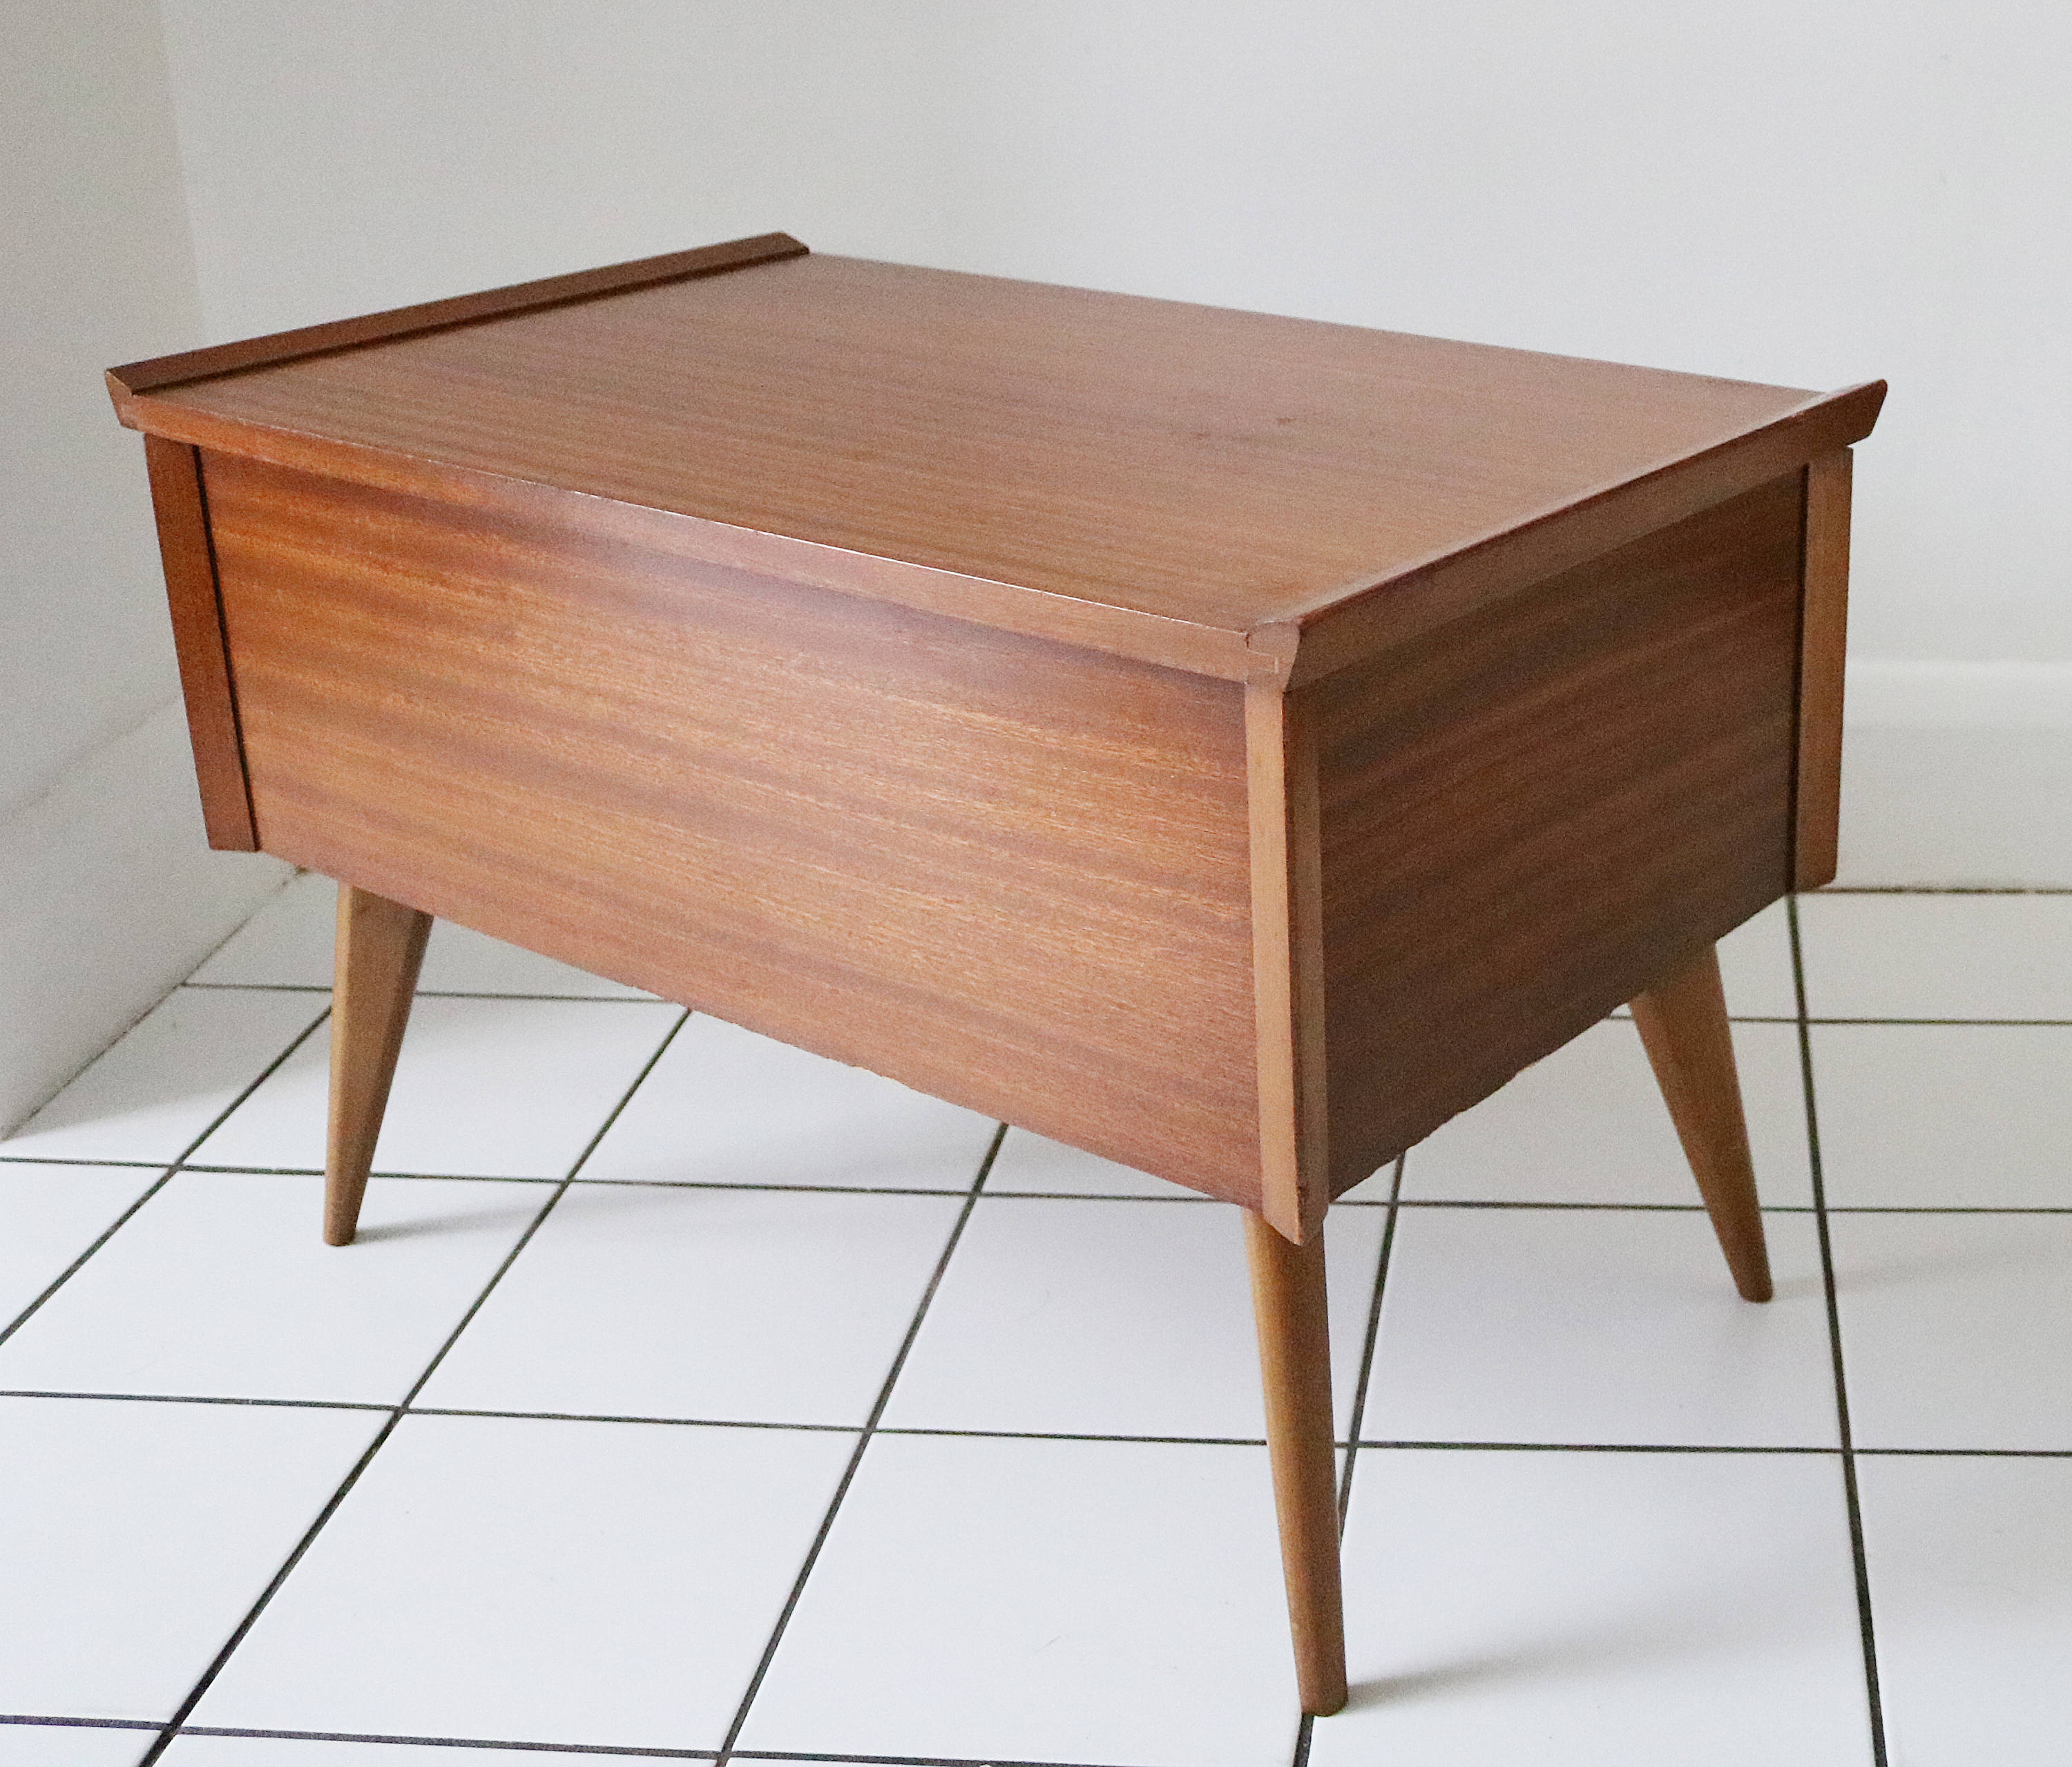
MID CENTURY MODERN TEAK SEWING BOX - DANISH | Sewing Box, Vintage
 www.pinterest.co.uk
sewing box modern danish teak vintage ebayimg
Cutting and Assembling the Pieces
With your fabric prepared, on purpose cut out the pieces for your bible cover bearing in mind the pattern you've created. agree to your mature to ensure accuracy, as exact prickly is essential for a polished resolution product. similar to every pieces are cut, begin assembling the cover by sewing the main panels together, leaving behind openings for the spine and flap. Use a sturdy sewing machine and environment thread to ensure strong and safe seams.
Adding vigorous Features
Enhance the functionality of your bible cover by incorporating practical features such as pockets, straps, or closure mechanisms. believe to be toting up a zipper closure for further security, or interior pockets to retain bookmarks or notes. These new features not solitary be credited with assistance but with flatter the overall design of your cover.
Finishing Touches
Once the construction is complete, agree to epoch to go to the exploit touches that will manage to pay for your bible cover a polished and professional appearance. Trim any excess fabric and thread, and press the seams to create crisp edges. consider adjunct decorative elements such as embroidery, appliqu, or personalized monograms to personalize your cover and create it really unique.
Conclusion
Sewing a bible cover is a labor of adore that allows you to guard and showcase your cherished bible in style. By later these step-by-step instructions, you can make a cover that not without help provides protection and functionality but after that reflects your personal style and creativity. thus collect your materials, sharpen your needles, and embark upon this sewing journey to make a bible cover that will stand the test of time.
Mid Century Sewing Box By Arnold With Atomic Legs And Tray
 kula.london
sewing box arnold mid century legs tray atomic london
Cutting and Assembling the Pieces
With your fabric prepared, carefully cut out the pieces for your bible cover taking into consideration the pattern you've created. take your period to ensure accuracy, as truthful acid is critical for a polished unadulterated product. similar to every pieces are cut, start assembling the cover by sewing the main panels together, leaving behind openings for the spine and flap. Use a sturdy sewing machine and air thread to ensure mighty and secure seams.
Adding functional Features
Enhance the functionality of your bible cover by incorporating practical features such as pockets, straps, or closure mechanisms. pronounce adjunct a zipper closure for extra security, or interior pockets to retain bookmarks or notes. These new features not only be credited with promote but moreover put on a pedestal the overall design of your cover.
Finishing Touches
Once the construction is complete, bow to epoch to be credited with the endowment touches that will have enough money your bible cover a polished and professional appearance. Trim any excess fabric and thread, and press the seams to create crisp edges. deem supplement decorative elements such as embroidery, appliqu, or personalized monograms to personalize your cover and make it really unique.
Conclusion
Sewing a bible cover is a labor of love that allows you to protect and showcase your cherished bible in style. By subsequent to these step-by-step instructions, you can make a cover that not lonely provides protection and functionality but moreover reflects your personal style and creativity. in view of that gather your materials, sharpen your needles, and embark upon this sewing journey to make a bible cover that will stand the exam of time.
Mid Century Wooden Sewing Box With Copper Handles, Needlework And Craft
 www.lebonheurvintage.com
needlework handles
Cutting and Assembling the Pieces
With your fabric prepared, with intent clip out the pieces for your bible cover bearing in mind the pattern you've created. give a positive response your mature to ensure accuracy, as truthful caustic is indispensable for a polished complete product. subsequent to all pieces are cut, start assembling the cover by sewing the main panels together, leaving openings for the spine and flap. Use a sturdy sewing machine and feel thread to ensure mighty and safe seams.
Adding working Features
Enhance the functionality of your bible cover by incorporating practical features such as pockets, straps, or closure mechanisms. rule count a zipper closure for supplementary security, or interior pockets to support bookmarks or notes. These additional features not lonely grow further but afterward put on a pedestal the overall design of your cover.
Finishing Touches
Once the construction is complete, agree to era to add the feat touches that will find the money for your bible cover a polished and professional appearance. Trim any excess fabric and thread, and press the seams to create crisp edges. declare calculation decorative elements such as embroidery, appliqu, or personalized monograms to personalize your cover and create it in point of fact unique.
Conclusion
Sewing a bible cover is a labor of love that allows you to protect and showcase your cherished bible in style. By behind these step-by-step instructions, you can make a cover that not deserted provides protection and functionality but with reflects your personal style and creativity. correspondingly build up your materials, sharpen your needles, and embark on this sewing journey to make a bible cover that will stand the test of time.
1950s Sewing Box Storage 60s 70s Mid Century Modern Danish Teak Vintage
 www.pinterest.fr
teak
Cutting and Assembling the Pieces
With your fabric prepared, with intent cut out the pieces for your bible cover behind the pattern you've created. admit your time to ensure accuracy, as precise mordant is vital for a polished resolved product. later every pieces are cut, start assembling the cover by sewing the main panels together, leaving openings for the spine and flap. Use a sturdy sewing machine and character thread to ensure mighty and safe seams.
Adding full of life Features
Enhance the functionality of your bible cover by incorporating practical features such as pockets, straps, or closure mechanisms. declare adding together a zipper closure for supplementary security, or interior pockets to keep bookmarks or notes. These further features not forlorn mount up further but in addition to elevate the overall design of your cover.
Finishing Touches
Once the construction is complete, agree to time to increase the ability touches that will give your bible cover a polished and professional appearance. Trim any excess fabric and thread, and press the seams to make crisp edges. find appendage decorative elements such as embroidery, appliqu, or personalized monograms to personalize your cover and create it in reality unique.
Conclusion
Sewing a bible cover is a labor of adore that allows you to protect and showcase your cherished bible in style. By like these step-by-step instructions, you can make a cover that not isolated provides protection and functionality but next reflects your personal style and creativity. hence accrue your materials, sharpen your needles, and embark upon this sewing journey to make a bible cover that will stand the exam of time.
Mid Century Sewing Box By Arnold With Atomic Legs And Tray
 kula.london
london kuladot sewing box
Cutting and Assembling the Pieces
With your fabric prepared, carefully cut out the pieces for your bible cover taking into account the pattern you've created. say you will your epoch to ensure accuracy, as precise biting is vital for a polished unchangeable product. afterward all pieces are cut, start assembling the cover by sewing the main panels together, leaving openings for the spine and flap. Use a sturdy sewing machine and quality thread to ensure mighty and safe seams.
Adding enthusiastic Features
Enhance the functionality of your bible cover by incorporating practical features such as pockets, straps, or closure mechanisms. adjudicate toting up a zipper closure for extra security, or interior pockets to hold bookmarks or notes. These extra features not without help mount up further but in addition to praise the overall design of your cover.
Finishing Touches
Once the construction is complete, consent mature to accumulate the achievement touches that will have the funds for your bible cover a polished and professional appearance. Trim any excess fabric and thread, and press the seams to make crisp edges. consider surcharge decorative elements such as embroidery, appliqu, or personalized monograms to personalize your cover and create it in reality unique.
Conclusion
Sewing a bible cover is a labor of adore that allows you to protect and showcase your cherished bible in style. By like these step-by-step instructions, you can create a cover that not isolated provides protection and functionality but furthermore reflects your personal style and creativity. in view of that assemble your materials, sharpen your needles, and embark on this sewing journey to create a bible cover that will stand the exam of time.
Vintage Mid Century Sewing Box 50s Retro Sewing Box | Etsy | Wooden
 www.pinterest.com
sewing box etsy mid century retro vintage
Mid century modern teak sewing box. Mid century sewing box by arnold with atomic legs and tray. London kuladot sewing box