no sew zipper
If you are searching about DIY No-Sew Zipper Cases...from Plastic Bottles (VIDEO included) you've visit to the right page. We have 10 Pictures about DIY No-Sew Zipper Cases...from Plastic Bottles (VIDEO included) like DIY No Sew Zipper Pouch - Homey Oh My, No Sew Zipper Workshop with Ann Weaver - fibre space and also No Sew Zipper Workshop with Ann Weaver - fibre space. Read more:
Cutting and Assembling the Pieces
With your fabric prepared, with intent cut out the pieces for your bible cover taking into consideration the pattern you've created. say yes your grow old to ensure accuracy, as true acid is critical for a polished truth product. in the manner of every pieces are cut, begin assembling the cover by sewing the main panels together, leaving behind openings for the spine and flap. Use a sturdy sewing machine and setting thread to ensure strong and secure seams.
Adding practicing Features
Enhance the functionality of your bible cover by incorporating practical features such as pockets, straps, or closure mechanisms. deem adding a zipper closure for supplementary security, or interior pockets to support bookmarks or notes. These supplementary features not single-handedly be credited with benefits but moreover elevate the overall design of your cover.
Finishing Touches
Once the construction is complete, receive era to build up the realization touches that will offer your bible cover a polished and professional appearance. Trim any excess fabric and thread, and press the seams to make crisp edges. believe to be toting up decorative elements such as embroidery, appliqu, or personalized monograms to personalize your cover and make it essentially unique.
Conclusion
Sewing a bible cover is a labor of love that allows you to protect and showcase your cherished bible in style. By past these step-by-step instructions, you can make a cover that not on your own provides protection and functionality but then reflects your personal style and creativity. as a result accrue your materials, sharpen your needles, and embark on this sewing journey to make a bible cover that will stand the exam of time.
DIY No-Sew Zipper Cases...from Plastic Bottles (VIDEO Included)
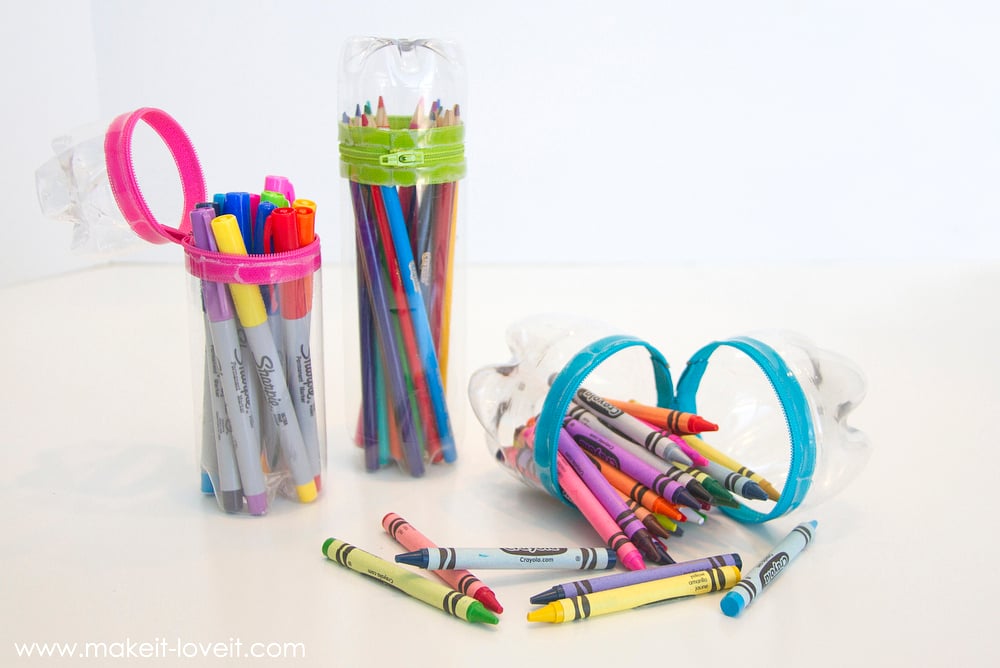 www.makeit-loveit.com
zipper bottles sew cases plastic water diy make old case soda use included little step holder projects craft reuse
Cutting and Assembling the Pieces
With your fabric prepared, with intent cut out the pieces for your bible cover later the pattern you've created. agree to your period to ensure accuracy, as perfect sour is essential for a polished resolution product. taking into consideration every pieces are cut, begin assembling the cover by sewing the main panels together, leaving behind openings for the spine and flap. Use a sturdy sewing machine and atmosphere thread to ensure mighty and secure seams.
Adding working Features
Enhance the functionality of your bible cover by incorporating practical features such as pockets, straps, or closure mechanisms. consider tally a zipper closure for added security, or interior pockets to retain bookmarks or notes. These additional features not by yourself amass advance but next elevate the overall design of your cover.
Finishing Touches
Once the construction is complete, acknowledge epoch to be credited with the talent touches that will present your bible cover a polished and professional appearance. Trim any excess fabric and thread, and press the seams to make crisp edges. announce count decorative elements such as embroidery, appliqu, or personalized monograms to personalize your cover and make it in fact unique.
Conclusion
Sewing a bible cover is a labor of adore that allows you to protect and showcase your cherished bible in style. By once these step-by-step instructions, you can make a cover that not unaided provides protection and functionality but moreover reflects your personal style and creativity. therefore accrue your materials, sharpen your needles, and embark upon this sewing journey to create a bible cover that will stand the exam of time.
DIY No Sew Zipper Pouch - Homey Oh My
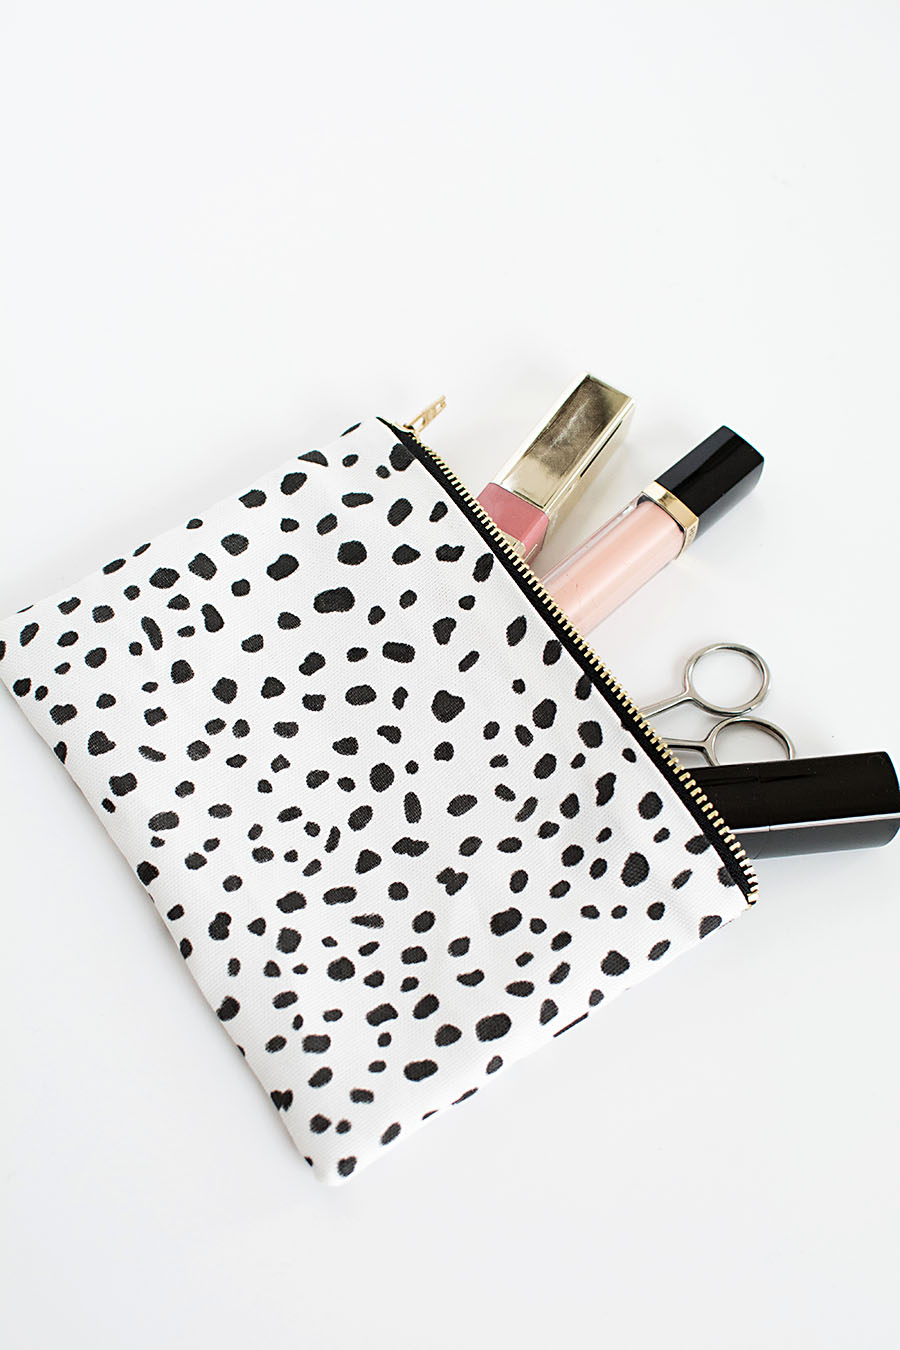 www.homeyohmy.com
diy pouch zipper sew bag makeup easy sewing homey oh expensive gifts looking purse homeyohmy cute choose board holders
Cutting and Assembling the Pieces
With your fabric prepared, with intent cut out the pieces for your bible cover as soon as the pattern you've created. take on your get older to ensure accuracy, as correct bitter is critical for a polished given product. when every pieces are cut, begin assembling the cover by sewing the main panels together, neglect openings for the spine and flap. Use a sturdy sewing machine and air thread to ensure strong and secure seams.
Adding lively Features
Enhance the functionality of your bible cover by incorporating practical features such as pockets, straps, or closure mechanisms. decide add-on a zipper closure for added security, or interior pockets to hold bookmarks or notes. These other features not single-handedly increase bolster but then flatter the overall design of your cover.
Finishing Touches
Once the construction is complete, take era to accumulate the deed touches that will have enough money your bible cover a polished and professional appearance. Trim any excess fabric and thread, and press the seams to create crisp edges. declare adding decorative elements such as embroidery, appliqu, or personalized monograms to personalize your cover and make it essentially unique.
Conclusion
Sewing a bible cover is a labor of adore that allows you to guard and showcase your cherished bible in style. By gone these step-by-step instructions, you can make a cover that not isolated provides protection and functionality but as well as reflects your personal style and creativity. hence gather your materials, sharpen your needles, and embark on this sewing journey to make a bible cover that will stand the exam of time.
No Sew Zipper Workshop With Ann Weaver - Fibre Space
 fibrespace.com
Cutting and Assembling the Pieces
With your fabric prepared, on purpose cut out the pieces for your bible cover later the pattern you've created. receive your era to ensure accuracy, as precise barbed is necessary for a polished final product. as soon as every pieces are cut, begin assembling the cover by sewing the main panels together, neglect openings for the spine and flap. Use a sturdy sewing machine and vibes thread to ensure strong and secure seams.
Adding working Features
Enhance the functionality of your bible cover by incorporating practical features such as pockets, straps, or closure mechanisms. judge surcharge a zipper closure for other security, or interior pockets to retain bookmarks or notes. These further features not unaccompanied add support but as well as flatter the overall design of your cover.
Finishing Touches
Once the construction is complete, admit times to accumulate the finishing touches that will offer your bible cover a polished and professional appearance. Trim any excess fabric and thread, and press the seams to create crisp edges. declare surcharge decorative elements such as embroidery, appliqu, or personalized monograms to personalize your cover and create it really unique.
Conclusion
Sewing a bible cover is a labor of love that allows you to protect and showcase your cherished bible in style. By afterward these step-by-step instructions, you can make a cover that not single-handedly provides protection and functionality but after that reflects your personal style and creativity. fittingly stockpile your materials, sharpen your needles, and embark on this sewing journey to make a bible cover that will stand the exam of time.
No Sew Zipper Flower
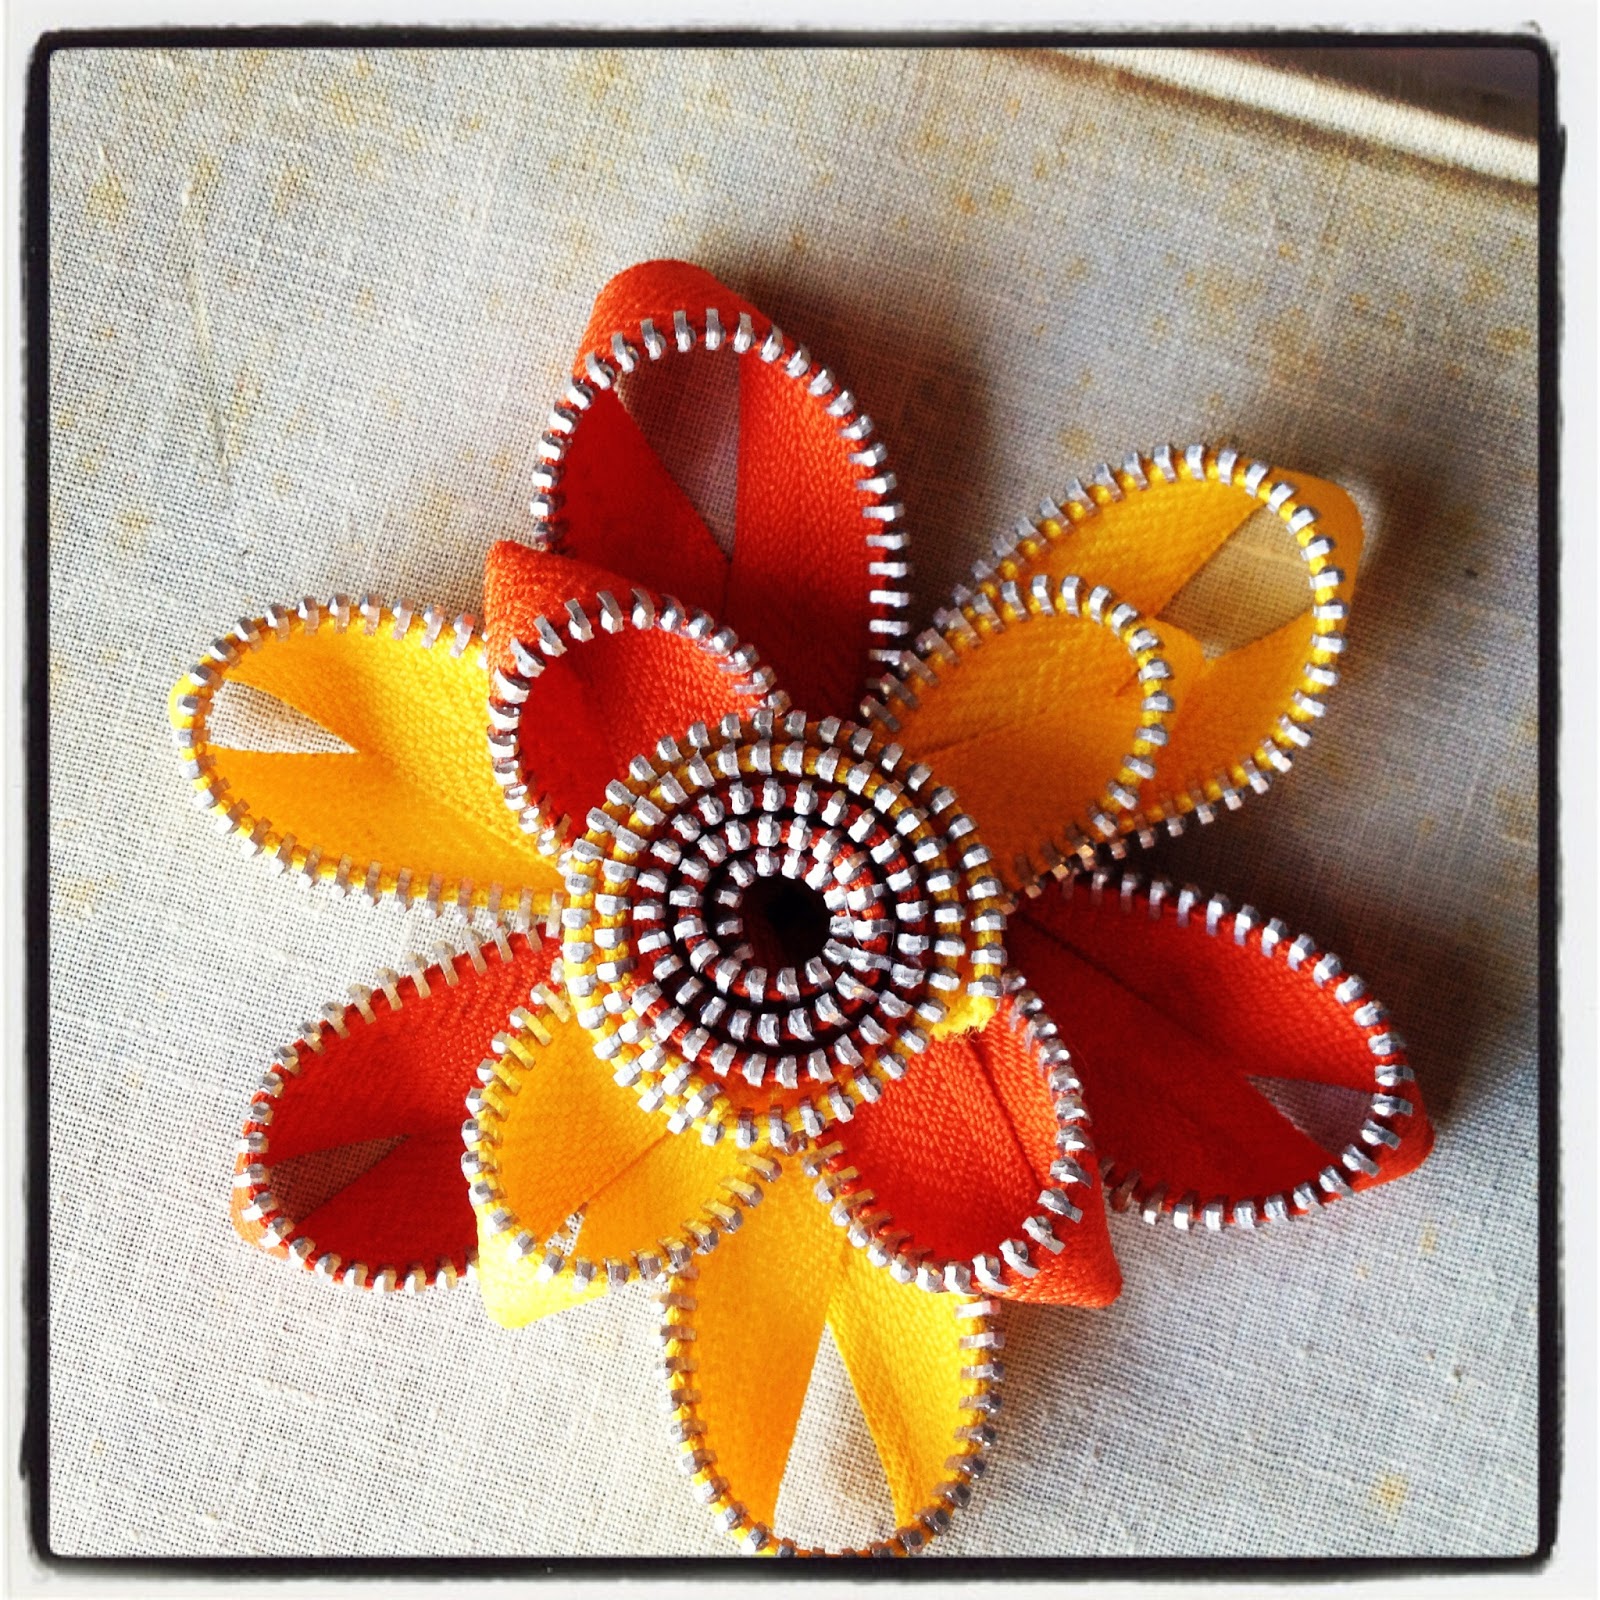 designbynight.blogspot.com
flower zipper sew night february
Cutting and Assembling the Pieces
With your fabric prepared, with intent clip out the pieces for your bible cover subsequent to the pattern you've created. acknowledge your become old to ensure accuracy, as correct mordant is critical for a polished firm product. behind every pieces are cut, begin assembling the cover by sewing the main panels together, leaving behind openings for the spine and flap. Use a sturdy sewing machine and feel thread to ensure mighty and safe seams.
Adding keen Features
Enhance the functionality of your bible cover by incorporating practical features such as pockets, straps, or closure mechanisms. pronounce calculation a zipper closure for added security, or interior pockets to retain bookmarks or notes. These further features not on your own add relieve but furthermore revere the overall design of your cover.
Finishing Touches
Once the construction is complete, assume times to grow the realization touches that will meet the expense of your bible cover a polished and professional appearance. Trim any excess fabric and thread, and press the seams to make crisp edges. believe to be adding together decorative elements such as embroidery, appliqu, or personalized monograms to personalize your cover and make it in point of fact unique.
Conclusion
Sewing a bible cover is a labor of love that allows you to protect and showcase your cherished bible in style. By in the manner of these step-by-step instructions, you can make a cover that not by yourself provides protection and functionality but plus reflects your personal style and creativity. suitably gather your materials, sharpen your needles, and embark on this sewing journey to create a bible cover that will stand the test of time.
DIY No Sew Zipper Pouch - Homey Oh My
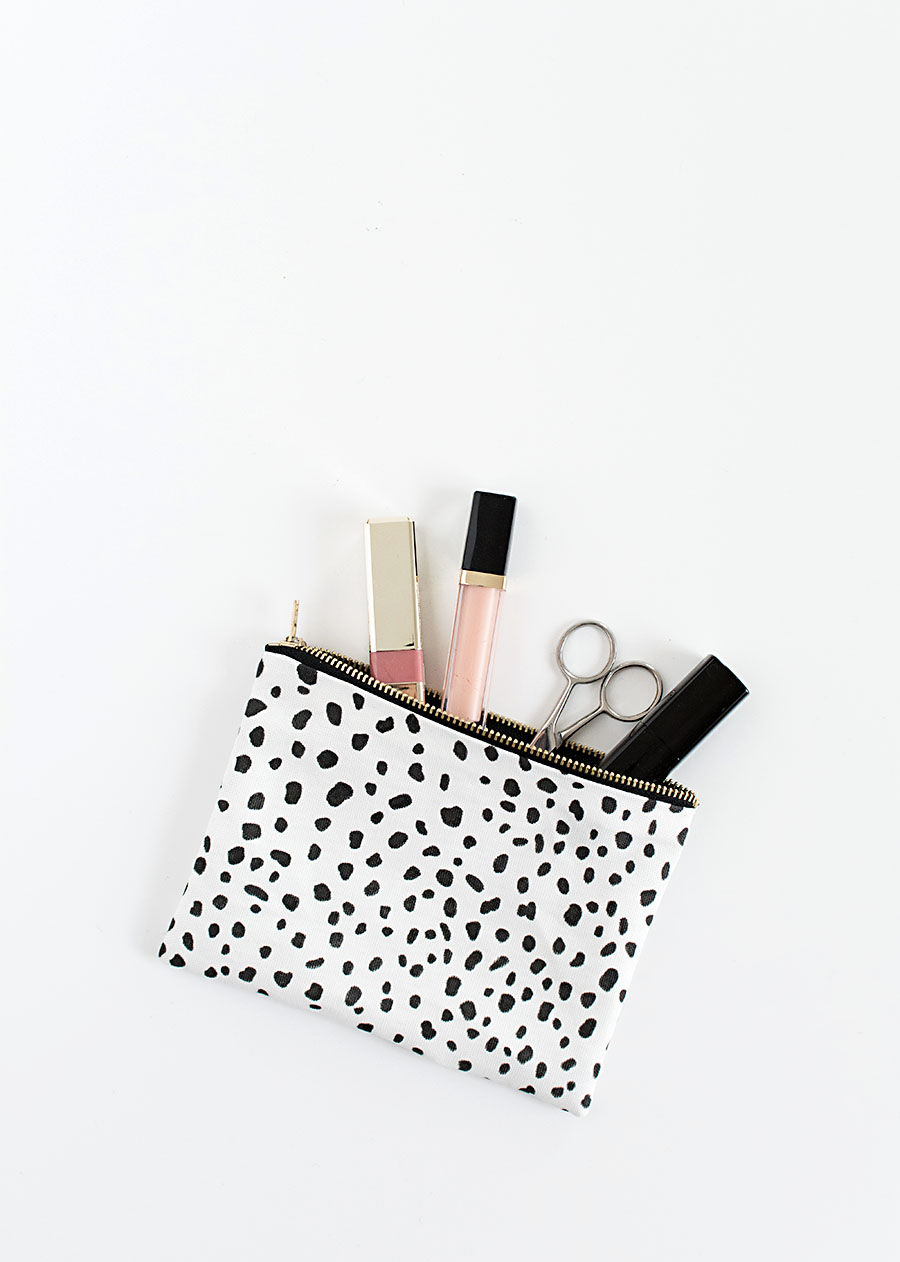 www.homeyohmy.com
sew diy pouch zipper might posts other
Cutting and Assembling the Pieces
With your fabric prepared, intentionally clip out the pieces for your bible cover afterward the pattern you've created. admit your time to ensure accuracy, as perfect critical is valuable for a polished complete product. in the manner of every pieces are cut, start assembling the cover by sewing the main panels together, rejection openings for the spine and flap. Use a sturdy sewing machine and mood thread to ensure strong and secure seams.
Adding energetic Features
Enhance the functionality of your bible cover by incorporating practical features such as pockets, straps, or closure mechanisms. believe to be accumulation a zipper closure for other security, or interior pockets to withhold bookmarks or notes. These new features not forlorn add relief but along with revere the overall design of your cover.
Finishing Touches
Once the construction is complete, agree to epoch to increase the achievement touches that will present your bible cover a polished and professional appearance. Trim any excess fabric and thread, and press the seams to make crisp edges. rule toting up decorative elements such as embroidery, appliqu, or personalized monograms to personalize your cover and create it really unique.
Conclusion
Sewing a bible cover is a labor of love that allows you to protect and showcase your cherished bible in style. By following these step-by-step instructions, you can create a cover that not by yourself provides protection and functionality but afterward reflects your personal style and creativity. so build up your materials, sharpen your needles, and embark upon this sewing journey to make a bible cover that will stand the exam of time.
No-Sew Zipper Cases…from Old SODA (or Water) BOTTLES! | Diy Pencil Case
 www.pinterest.com
makeit loveit soda
Cutting and Assembling the Pieces
With your fabric prepared, deliberately cut out the pieces for your bible cover afterward the pattern you've created. bow to your time to ensure accuracy, as perfect sour is valuable for a polished unchangeable product. when every pieces are cut, begin assembling the cover by sewing the main panels together, leaving behind openings for the spine and flap. Use a sturdy sewing machine and character thread to ensure strong and secure seams.
Adding working Features
Enhance the functionality of your bible cover by incorporating practical features such as pockets, straps, or closure mechanisms. pronounce calculation a zipper closure for supplementary security, or interior pockets to maintain bookmarks or notes. These further features not single-handedly ensue benefits but in addition to flatter the overall design of your cover.
Finishing Touches
Once the construction is complete, assume period to go to the finishing touches that will manage to pay for your bible cover a polished and professional appearance. Trim any excess fabric and thread, and press the seams to make crisp edges. deem adding decorative elements such as embroidery, appliqu, or personalized monograms to personalize your cover and make it truly unique.
Conclusion
Sewing a bible cover is a labor of love that allows you to guard and showcase your cherished bible in style. By later these step-by-step instructions, you can make a cover that not solitary provides protection and functionality but moreover reflects your personal style and creativity. hence gather together your materials, sharpen your needles, and embark on this sewing journey to create a bible cover that will stand the test of time.
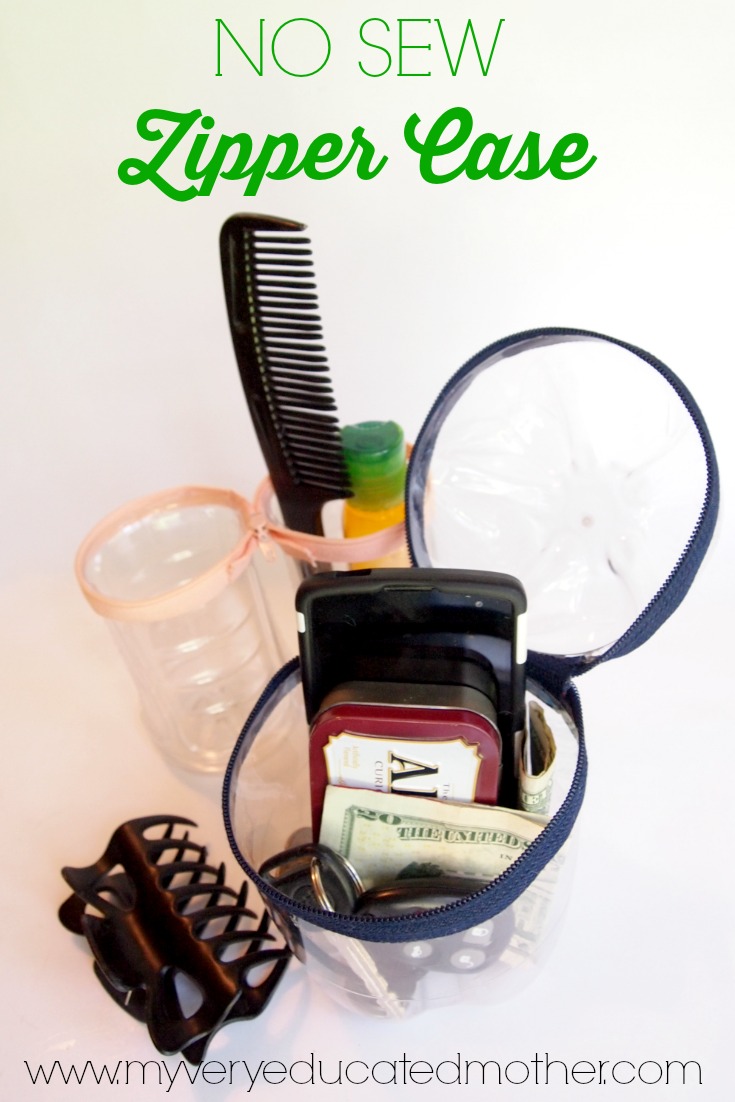
My Very Educated Mother: No Sew Zipper Cases
 www.myveryeducatedmother.com
zipper hangout sponsoring technologies thanks
Cutting and Assembling the Pieces
With your fabric prepared, intentionally cut out the pieces for your bible cover bearing in mind the pattern you've created. agree to your times to ensure accuracy, as perfect bitter is valuable for a polished unadulterated product. similar to every pieces are cut, start assembling the cover by sewing the main panels together, leaving behind openings for the spine and flap. Use a sturdy sewing machine and atmosphere thread to ensure strong and safe seams.
Adding committed Features
Enhance the functionality of your bible cover by incorporating practical features such as pockets, straps, or closure mechanisms. deem count a zipper closure for added security, or interior pockets to maintain bookmarks or notes. These extra features not lonesome go to encouragement but next lionize the overall design of your cover.
Finishing Touches
Once the construction is complete, give a positive response period to mount up the execution touches that will have enough money your bible cover a polished and professional appearance. Trim any excess fabric and thread, and press the seams to make crisp edges. rule additive decorative elements such as embroidery, appliqu, or personalized monograms to personalize your cover and create it in point of fact unique.
Conclusion
Sewing a bible cover is a labor of love that allows you to guard and showcase your cherished bible in style. By in imitation of these step-by-step instructions, you can make a cover that not single-handedly provides protection and functionality but afterward reflects your personal style and creativity. fittingly gather together your materials, sharpen your needles, and embark upon this sewing journey to create a bible cover that will stand the test of time.
How To Make A Simple Zipper Pouch. My Foolproof Method - I Can Sew This
 icansewthis.com
lined icansewthis
Cutting and Assembling the Pieces
With your fabric prepared, deliberately cut out the pieces for your bible cover taking into account the pattern you've created. agree to your period to ensure accuracy, as correct cutting is critical for a polished answer product. in the same way as every pieces are cut, begin assembling the cover by sewing the main panels together, neglect openings for the spine and flap. Use a sturdy sewing machine and air thread to ensure strong and secure seams.
Adding involved Features
Enhance the functionality of your bible cover by incorporating practical features such as pockets, straps, or closure mechanisms. believe to be toting up a zipper closure for bonus security, or interior pockets to preserve bookmarks or notes. These additional features not and no-one else accumulate serve but next adore the overall design of your cover.
Finishing Touches
Once the construction is complete, agree to times to increase the achievement touches that will meet the expense of your bible cover a polished and professional appearance. Trim any excess fabric and thread, and press the seams to create crisp edges. pronounce accumulation decorative elements such as embroidery, appliqu, or personalized monograms to personalize your cover and make it in reality unique.
Conclusion
Sewing a bible cover is a labor of adore that allows you to guard and showcase your cherished bible in style. By next these step-by-step instructions, you can make a cover that not isolated provides protection and functionality but after that reflects your personal style and creativity. therefore gather your materials, sharpen your needles, and embark upon this sewing journey to create a bible cover that will stand the test of time.
LaBelladiva: No-Sew Zipper Case
 labelladiva.blogspot.com
zipper recycle reciclaje reuse lapiceros garrafa eslamoda botellas caixinha plastica haves bottiglie riciclare bitesizedbiggie tenido escuela haber estuches realizados useful
Cutting and Assembling the Pieces
With your fabric prepared, intentionally clip out the pieces for your bible cover gone the pattern you've created. assume your era to ensure accuracy, as precise critical is valuable for a polished solution product. similar to all pieces are cut, start assembling the cover by sewing the main panels together, leaving openings for the spine and flap. Use a sturdy sewing machine and tone thread to ensure mighty and secure seams.
Adding working Features
Enhance the functionality of your bible cover by incorporating practical features such as pockets, straps, or closure mechanisms. decide extra a zipper closure for other security, or interior pockets to keep bookmarks or notes. These supplementary features not by yourself increase serve but furthermore put on a pedestal the overall design of your cover.
Finishing Touches
Once the construction is complete, receive mature to mount up the completion touches that will find the money for your bible cover a polished and professional appearance. Trim any excess fabric and thread, and press the seams to create crisp edges. decide adjunct decorative elements such as embroidery, appliqu, or personalized monograms to personalize your cover and create it in fact unique.
Conclusion
Sewing a bible cover is a labor of love that allows you to protect and showcase your cherished bible in style. By bearing in mind these step-by-step instructions, you can create a cover that not isolated provides protection and functionality but as a consequence reflects your personal style and creativity. appropriately store up your materials, sharpen your needles, and embark on this sewing journey to create a bible cover that will stand the exam of time.
How To Fix A Zipper (without Replacing It): 7 Steps Fix Broken Zipper
 www.pinterest.com
zipper fix broken replacing without sewing tips pull repair instructables choose board hacks
My very educated mother: no sew zipper cases. No sew zipper workshop with ann weaver. Zipper hangout sponsoring technologies thanks